
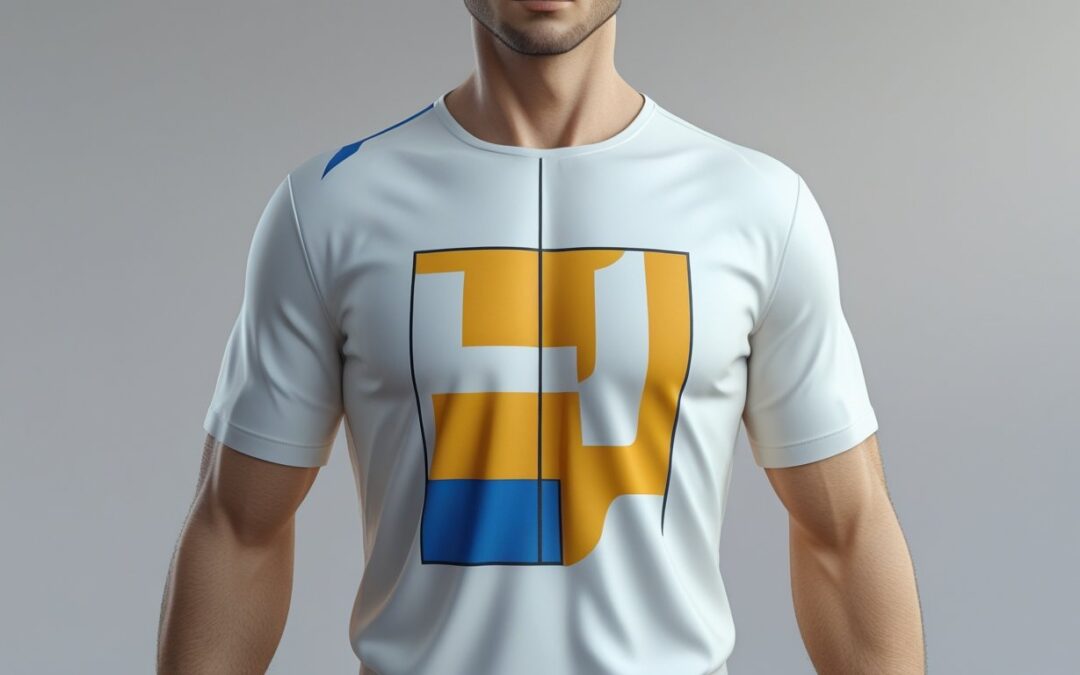
Displaying shirt designs on 3D models is transforming how fashion creators and retailers visualize their ideas before production. Instead of relying on flat sketches or costly prototypes, designers can now see how graphics, textures, and logos wrap around a garment in real time.
This improves accuracy, saves time, and ensures that the final product aligns closely with the original concept.
Working with Voxel Magic means access to advanced 3D visualization tools and expert guidance. Our team helps brands move from concept to presentation quickly, reducing costly mistakes and streamlining collaboration with manufacturers.
In this guide, we’ll explore the tools, techniques, and best practices for displaying shirt designs on 3D models, along with their benefits for designers, retailers, and customers.
Overview of Displaying Shirt Designs on 3D Models
Displaying shirt designs on 3D models allows creators to see how patterns, logos, or graphics will look on actual garments before they are made. This process improves design accuracy and speeds up decision-making.
It involves specific steps that link digital artwork to 3D representations. These can be viewed from multiple angles.
Importance of 3D Visualization in Apparel
3D visualization helps designers and retailers preview clothing designs in realistic settings without producing physical samples. It reduces waste by identifying design flaws early and streamlining the approval process.
Designers gain clearer insights into color, texture, and fit when they map designs onto digital shirts. Retailers use 3D models to showcase products online with more detail than flat images.
This boosts customer confidence by allowing them to explore the garment virtually. 3D displays save time and resources while enhancing creative control.
The Role of 3D Visualization in Reducing Fashion Waste
According to the Ellen MacArthur Foundation, the fashion industry produces over 92 million tons of textile waste annually. By integrating 3D visualization tools into apparel design, brands can significantly cut down on physical sampling, one of the leading contributors to waste.
Displaying shirt designs on 3D models enables teams to test variations digitally before committing to production. This not only reduces material use but also aligns with growing demands for sustainable fashion practices.
Workflow Summary
The workflow typically starts with creating or selecting a 3D shirt model. Designers then apply their artwork as textures or image layers to the digital garment.
Proper UV mapping ensures the design fits the shirt’s shape without distortion. Software like Blender, Adobe Dimension, or online generators helps in layering the design on the model.
Adjustments are made to lighting, shadows, and angles to create a realistic preview. Finally, designers export the mockup for presentations, marketing, or client review.
Key Benefits for Designers and Retailers
For designers, 3D shirt models offer fast iteration on ideas and detailed control over the final look. They can test multiple designs quickly and make real-time changes.
This reduces the cost of sample production and shortens the design cycle. Retailers benefit by using 3D visuals to enhance online shopping experiences.
Customers can rotate shirts and view designs more clearly, which lowers return rates. 3D mockups support marketing campaigns with dynamic content, helping to engage audiences digitally.
Essential Tools and Software for 3D Shirt Mockups
Creating realistic 3D shirt mockups requires the right platforms and tools. Software choice depends on design needs, ease of use, and customization options.
Enhanced plug-ins also add value by improving workflow and design detail.
Popular 3D Modeling Platforms
Several platforms lead the field in 3D shirt modeling and visualization. Blender offers free, open-source 3D modeling with powerful tools for fabric simulation and lighting.
It suits users who are comfortable with learning advanced features. Marvelous Designer specializes in garment creation, allowing realistic cloth movement and fit simulation.
This tool excels for designers focused on precise fabric behavior and tailoring. For simpler workflows, tools like Pacdora provide 3D previews specifically for apparel, including sleeves and collars, making designs appear more lifelike.
Canva and similar options focus more on 2D visuals but can complement 3D modeling in social media contexts.
Choosing the Right Software for Shirt Visualization
Selecting 3D shirt mockup software depends on project goals. For high-detail presentations, programs with fabric physics and custom materials are essential.
This ensures the design wraps naturally and reflects realistic lighting. Budget and time constraints also play a role.
Free or affordable options like Printonator and MockFlick offer user-friendly interfaces and fast previews suited for startups and smaller design teams. In contrast, professional studios may opt for software supporting multiple file formats and integration with CAD and printing workflows to ensure accuracy and speed.
A clear checklist for selection includes:
- Realistic fabric rendering
- Ease of design, upload, and editing
- Integration with e-commerce or marketing platforms
- Support for animation or 360-degree views
Plug-ins and Extensions for Enhanced Functionality
Plug-ins extend the capabilities of core 3D platforms. For instance, add-ons for Blender improve texture mapping and automate shirt draping.
These tools reduce manual adjustments and speed up rendering times. Other extensions focus on material libraries that offer preset fabrics, colors, and stitching details.
These help maintain quality and consistency across designs. AI-powered mockup generators also serve as extensions, allowing users to upload logos or artwork and see immediate results on various shirt styles without deep manual edits.
Using plug-ins that sync with local 3D printing services ensures seamless movement from digital mockup to high-precision physical samples. This is essential for rapid prototyping in NYC’s fast-paced design environment.
Preparing Shirt Design Files for 3D Modeling
Before integrating designs onto 3D shirt models, certain file preparation steps ensure the best quality and compatibility. Designers should focus on using supported file formats, maintaining high-resolution artwork, and structuring design layers efficiently for easier editing and accurate previews.
Supported File Formats
Design files must be saved in formats compatible with 3D modeling software. Commonly supported formats include PNG, JPEG, and SVG for 2D designs.
PNG is preferred for its support of transparency, which helps when layering designs on models. For 3D-ready artwork, formats like OBJ, STL, or FBX are used, especially when designs involve textured surfaces or complex shapes.
These enable smooth import and manipulation in popular 3D programs such as Fusion 360 or SketchUp. It’s important to check software requirements before finalizing files.
Files with unsupported formats may cause errors or loss of detail in the 3D preview.
Tips for High-Quality Artwork
High resolution is key to sharp and detailed 3D displays. Artwork should be created at 300 DPI or higher to avoid pixelation when scaled.
Using vector graphics, such as SVG, offers scalability without quality loss. These clean paths are easier to manipulate and adjust in 3D software.
Colors must be chosen carefully, considering the final shirt fabric and printing process. Designers should keep the color palette simple and avoid gradients that may not translate well in 3D visualization.
Avoid overly complex designs with too many details that can clutter the mockup. Clean, bold imagery often delivers better results on 3D shirt models.
Optimizing Design Layers
Organizing design layers improves editing flexibility and speeds up workflow. Separating text, logos, and graphic elements into different layers allows easy adjustments during mockup creation.
Layers should be clearly named and grouped logically. For example, all text elements can go into one group while graphics go into another.
Flattening unnecessary layers can reduce file size but keep editable layers intact for future changes. This balance ensures the design remains agile for both presentation and printing purposes.
Proper layering also helps when simulating shirt folds and lighting effects in the 3D model. This makes the preview more realistic.
Techniques for Mapping Shirt Designs onto 3D Models
Mapping a shirt design onto a 3D model involves aligning the artwork precisely with the garment’s shape. This process ensures the design follows the shirt’s curves and seams, offering an accurate preview.
Effective mapping relies on understanding how to unwrap the 3D surface and place textures correctly.
UV Mapping Basics
UV mapping is the foundation for placing a 2D image onto a 3D shirt model. It unpacks the 3D shape into a flat 2D layout, allowing designers to position their artwork directly on the garment’s surface.
The “U” and “V” represent the horizontal and vertical axes of this flat space, distinct from the 3D model’s X, Y, and Z axes. Proper UV maps minimize stretching and distortion, keeping designs sharp and true to the intended proportions.
A clear UV layout follows the shirt’s key elements: front, back, sleeves, and collar. Marking seam lines helps align designs across different parts of the garment, maintaining seamless continuity when wrapped back on the 3D model.
Texture Placement Strategies
Once the UV map is ready, the next step is precise texture placement. Designers must consider how the fabric folds and stretches in real life to avoid distortions in the 3D preview.
Textures should be layered with attention to details like seams and buttons. Using high-resolution images prevents pixelation when zoomed in.
Designers often create separate texture layers for patterns, logos, and color blocks to adjust each element independently. Testing the texture on the model helps identify areas where the design might misalign or warp.
Careful tweaking during this phase ensures the digital shirt accurately represents the final physical product. This is essential for both design approval and production readiness.
Customizing Shirt Models for Realistic Display
Creating a convincing 3D shirt design requires fine-tuning how the shirt fits and behaves. Key elements include adjusting the shirt’s shape and texture, along with adding natural fabric details like folds and creases.
Together, these details help the design appear lifelike and ready for presentation.
Adjusting Fit and Fabric Properties
The fit of the shirt model affects how the design is perceived. Designers can change the shirt’s size and shape to match different body types or style preferences.
For example, a slim fit will appear tighter and highlight the design differently than a loose fit. Fabric properties such as thickness, stretch, and texture also impact realism.
Adjusting these settings simulates materials like cotton, polyester, or blends. Some tools allow control over sheen or roughness to mimic fabric feel under lighting.
Precise fit and fabric settings prevent unnatural stretching or distortion of the design. That attention to detail improves how the shirt appears in renders or mockups.
Adding Folds and Creases
Folds and creases give shirts visual depth and authenticity. These small details reflect how fabric naturally behaves on a body or a hanger. Designers can manually add or adjust folds to specific areas such as sleeves, sides, and underarms.
Good 3D software includes options for generating realistic wrinkles based on the shirt’s fit and motion. These creases help break up flat surfaces, giving fabric a dynamic, lived-in look.
The right number and placement of folds ensure that the design remains clear while enhancing texture. Overdoing wrinkles can obscure logos or graphics, so balance is key for a clean yet natural presentation.
Lighting and Rendering for Professional Visualization
Proper lighting and rendering are key to making a 3D shirt design look polished and realistic. The right lighting highlights details, shapes, and textures while rendering settings ensure a clean, sharp final image that shows the design clearly and professionally.
Choosing Lighting Setups
Lighting should enhance the shirt design without overpowering it. A common approach uses three-point lighting: a key light to highlight the main features, a fill light to soften shadows, and a backlight to separate the shirt from the background.
Soft, diffused light prevents harsh shadows that can hide design details. For 3D shirts, using an environment or HDRI light adds natural reflections that boost realism.
Adjusting light intensity and angle is crucial. The key is to balance brightness so textures and colors pop without washing out the shirt or creating glare. Staying consistent with light temperature (warm or cool tones) will keep the visualization uniform and professional.
Rendering Settings for Clarity
Rendering must focus on clarity and detail. Higher resolution renders show finer design elements clearly. Use anti-aliasing to smooth edges and reduce jagged lines. Materials and shaders should be fine-tuned.
Accurate fabric textures help the shirt look authentic. Subtle reflections or scattering effects simulate different cloth types effectively.
Settings like global illumination boost natural light behavior, enhancing depth and realism. Rendering with layers or passes allows fine control in post-processing, improving contrast and sharpness without over-editing.
A clean render shows your shirt design in the best possible light—literally. This professional clarity helps artists, designers, and clients see the true potential of every detail.
Exporting and Sharing 3D Shirt Visualizations
Exporting 3D shirt designs requires attention to file formats and optimization for different platforms. Sharing involves preparing the model for web use or augmented reality (AR), ensuring smooth display and interaction.
File Export Options
When exporting 3D shirt designs, common formats include OBJ, FBX, and GLTF/GLB. OBJ is widely used for static models with textures.
FBX supports animations and complex materials, making it useful for advanced presentations. GLTF/GLB is ideal for web and AR as it offers compact file sizes with embedded textures and efficient loading.
Designers should also consider resolution and polygon count. Lower polygon models export faster and perform better on devices, but may lose detail.
High-resolution exports provide more detail but require more computing power. Many design platforms allow exporting the model as a 2D image or turntable animation to share previews quickly without interactive 3D viewers.
Preparing Models for Web or AR Platforms
For smooth performance on the web or AR, 3D shirt models must be optimized. This means reducing file size by limiting polygons and compressing textures while maintaining visual quality.
Common practices include baking textures into the model and using efficient formats like GLB to support real-time rendering. Models should also be tested on target devices for speed and compatibility.
Metadata such as size, scale, and orientation should be standardized. This ensures the shirt appears correctly in AR environments.
Platforms like Sketchfab or custom web viewers allow users to rotate, zoom, and pan the 3D shirt. Sharing links or embedding models on websites makes designs accessible to clients and collaborators quickly and professionally.
Common Challenges and Troubleshooting
When displaying shirt designs on 3D models, issues often arise related to texture accuracy and system performance. Designers need to address these problems carefully to ensure the final output is smooth, clear, and efficient.
Texture Distortion Issues
Texture distortion happens when the shirt design stretches unevenly across the 3D model’s surface. This often occurs if the UV mapping—the method used to wrap a 2D image around a 3D shape—is not aligned correctly.
Poor UV layout can cause parts of the design to appear blurry or pixelated. To fix this, designers should ensure that the design resolution matches the model’s UV map size.
Breaking complex designs into smaller sections can improve detail control and reduce pixelation. Using software that supports high-resolution textures and adjusting texture filtering settings also helps maintain clarity.
Performance Optimization
High-resolution textures and complex models can slow down rendering and preview speeds. One common cause is excessive polygon count or overly large texture files that the software struggles to handle in real time.
Optimizing performance involves balancing detail with system capacity. Reducing polygon complexity without losing key details speeds up rendering.
Compressing texture files or using lower resolutions when working in the viewport can also improve responsiveness.
Future Trends in 3D Shirt Design Presentation
3D shirt design presentation is growing rapidly, with new technology shaping how designers work and showcase their ideas. Digital models now allow for precise visualization of shirt textures, folds, and colors. This makes the design process more efficient and accurate.
Customization is key. Advances in 3D configurators enable customers to personalize shirts in real time. This trend supports on-demand production, reducing waste and aligning with eco-friendly goals.
Materials are evolving, too. Designers increasingly use 3D printing with recycled or sustainable fabrics. This approach opens creative possibilities for intricate patterns and textures. A quick overview of upcoming trends:
| Trend | Impact |
| Real-time 3D configurators | Faster, interactive design reviews |
| Sustainable materials | Eco-friendly and innovative looks |
| Digital fabric simulation | More accurate fit and feel previews |
| On-demand production | Less waste, quicker delivery |
Local 3D printing partners play a vital role by offering fast, precise prototyping and short turnaround times. In places like New York City, close collaboration speeds up creative workflows and supports tighter deadlines.
Final Thoughts on 3D Shirt Visualization
3D shirt mockups are more than a design tool—they are a bridge between creativity and production. By allowing designers to visualize artwork on realistic garment models, they reduce errors, save resources, and create more engaging presentations. Retailers benefit from stronger e-commerce visuals, while customers gain confidence in what they see online.
For brands in New York City, partnering with Voxel Magic ensures access to fast, reliable, and detail-oriented 3D visualization. Their expertise helps transform design concepts into polished visuals ready for production or presentation.
Ready to bring your shirt designs to life with precision and speed? Contact us today to get started.
Frequently Asked Questions
How do designers put shirt designs onto 3D models?
Designers use 3D software with UV mapping to apply 2D artwork onto shirt models. This ensures logos, patterns, and graphics wrap naturally around the fabric without distortion.
What software is best for creating 3D shirt mockups?
Tools like Blender, Marvelous Designer, and online mockup generators provide strong options. Blender is free and powerful, while Marvelous Designer offers realistic cloth simulation.
Can 3D shirt mockups reduce fashion waste?
Yes. By testing designs digitally, brands can cut down on unnecessary physical samples. According to the Ellen MacArthur Foundation, reducing samples helps lower textile waste in the fashion industry.
How do 3D shirt previews help online retailers?
3D shirt mockups give customers a more interactive shopping experience. PwC reports that engaging digital content improves purchase confidence, leading to fewer returns.
Can 3D mockups be used for marketing campaigns?
Absolutely. Brands use 3D shirt mockups for ads, social media, and product pages. Dynamic 3D visuals help campaigns stand out and communicate design details clearly.
